Whenever I see a commercial greenhouse or farm, I always get this
feeling..”why can’t we grow plants like they do?”. The moment this
thought comes in, you start paying attention to details. You try to do
everything the right way and see if you can perfect the art.
My goal (more like a wish) right from the beginning is always to reduce the gap between commercial and home gardening in terms of yield. In some cases I was able to come little closer but in some I failed.
In this post, I will write about growing tomatoes in grow bags. Grow bags are lay flat bags filled with potting mix. Unlike containers, they don’t provide depth but they give enough room for the roots to explore. In this experiment I used grow bags made of coco peat. They don’t contain any nutrient in it and hence its our duty to provide all the nutrients the plants need.
It all starts from the seed. This time, I had some seeds of tomato from IndoAmerican seeds. A variety called INDAM Naveen. I have already grown this variety and was impressed with the productivity.
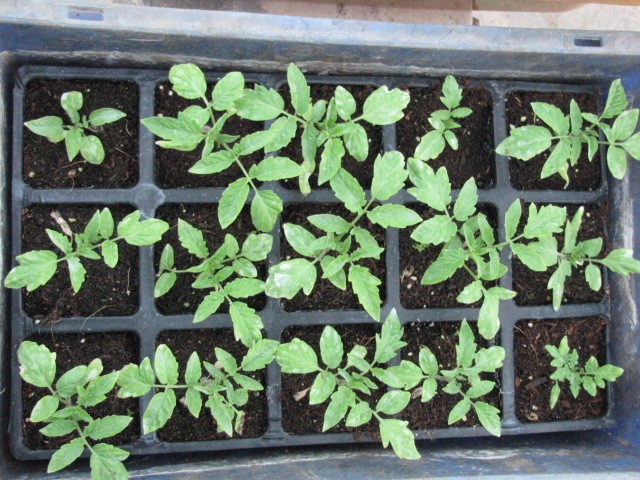
The seeds were sown thickly in a small pot and once they showed a true leaf, they were moved into a Pro tray.
Two weeks later they looked like this.
6/2/2010

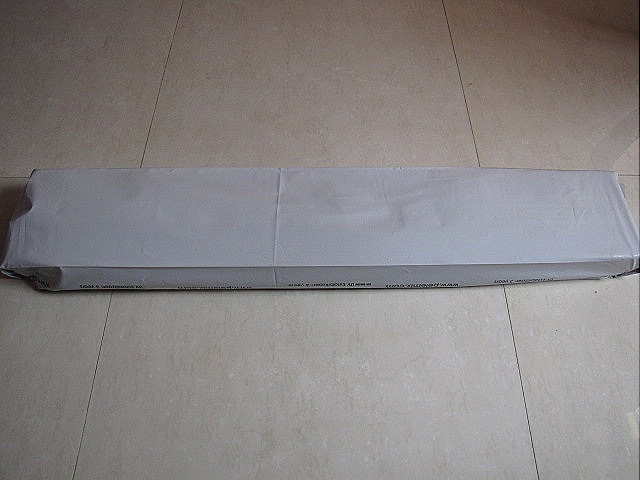
Now this is a typical grow bag. Its ~3 feet long and contains compressed cocopeat slab in it. Its ideal for growing 3-4 plants per bag.

In my case, I wanted to grow 3 tomato plants in this and hence made markings like below. Cut the bag on the lines made so that when you open the flips, you get a square hole cut out.

Next is to run water through it. Easiest is to use a pipe/hose tube. Let it soak and as it soaks, it expands as well. You can see the grow bag growing. Give it some time. Once its done, you will have fully expanded grow bag thats ready to take plants in.
Once expanded, these grow bags will look like this below. To transplant, I took juice boxes cut them into three and used them to hold the plant when they are small. Kinda made it look like Rockwool cubes .
.
Now comes the drainage part. Carefully make a slit 0.5-1 inch above the bottom surface of the grow bag at 2 or 3 places on the sides. As it is covered on most of the sides water loss through medium is very less. The seedlings that were in the pro tray were transplanted 3 per bag.
17/2/2010

You can also see that I have lined the bench with black polythene sheet. This is to collect all the drainage water at one place. There is a slope provided to the bench, so all the drainage flow to the lowest point, where the reservoir is kept
Alright, Now comes the interesting part. How do we water this thing?. Though it can be hand watered ( which I did for first couple of weeks), it can become very difficult as the opening is very small and needs lot of patience to water it. So obviously the next step was to install a drip system and automate it. Thats lot stuff mentioned in a single line right?. we will munch bite at a a time.
So here it is after 10 days time. The stake wires tied out nice and you can also see the spaghetti drip wires. These wires deliver the nutrient water to the plants.
28/2/2010

Dripping in action.

Another shot of the tomatoes on 11/3/2010

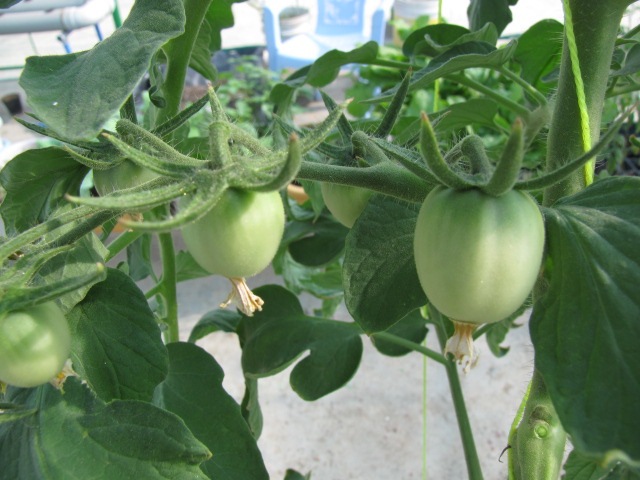
Tomatoes already started to form.

Setting up Automated Drip System:
Now comes the interesting part. Setting up the automated drip system. In Grow bag systems the nutrient is generally not recycled. But I didnt have the bandwidth to waste the nutrients. So I thought I would re use the drainage as well.
Things necessary for a automated drip system are :
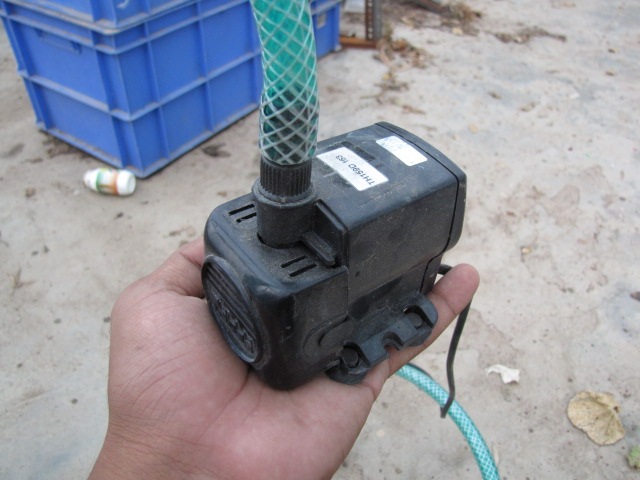
Submersible Pump:
This pumps are available in SJP Road in Bangalore( Road parallel to SP Road).This is from a company called Tullu. Costs about INR400-500 and there are cheaper chinese counterpart for INR 200 or so. It pumps water at about 400-500 litres per hour to height of 4 feet. It varies with pump to pump. Needs 240 V AC to operate.

Programmable Timer:
It took really long time to get this piece of hardware in Bangalore. Myself and my friend Anil Hande were searching and searching. It comes as a bare bone timer and we need to do some more work before it gets usable.

Like I said, the timer has just leads for connections and is not very user friendly. Below is the my version of the completed timer box. I got some help from Anil to get the wiring in place. You
can check out his version and more information on its wiring Anil’s Album

I have programmed in such a way that it operates for 15 minutes every 3 hours.
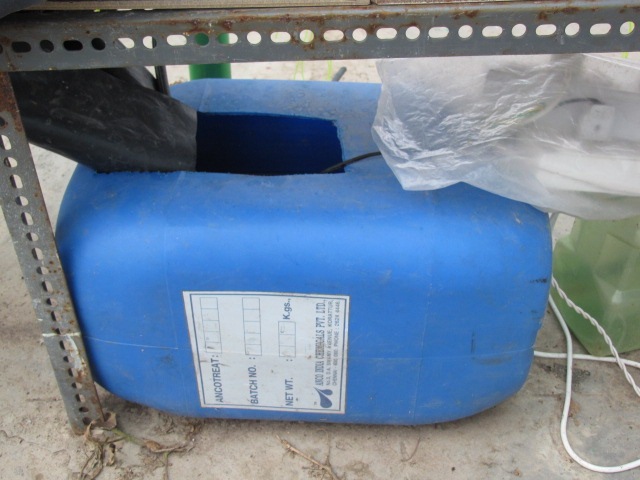
Reservoir: Here is my reservoir. Ok ..Not very nice looking but then who cares as long it is cheap. Another peace I picked up from local plastic recycle shop. The drained water pours in via the black poly sheet. Next to it you can spot the drip tube connected to Pump going out of the reservoir.

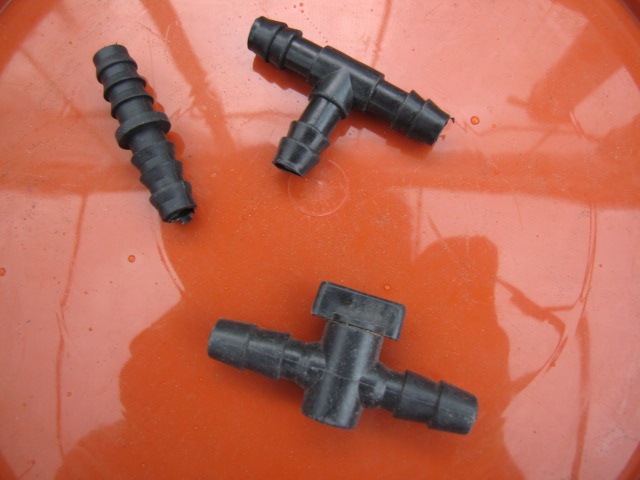
Here are some small accessories that you will need to setup a drip system.
They are called joints. On the top left, is simply joint, next is Tee joint and the one below is Tap joint. You can use them where ever you feel they are needed. There is also Elbow joint in case your drip tube needs to bend, I havent shown them in the pic. They cost INR 1 each. Available in SJP Road.

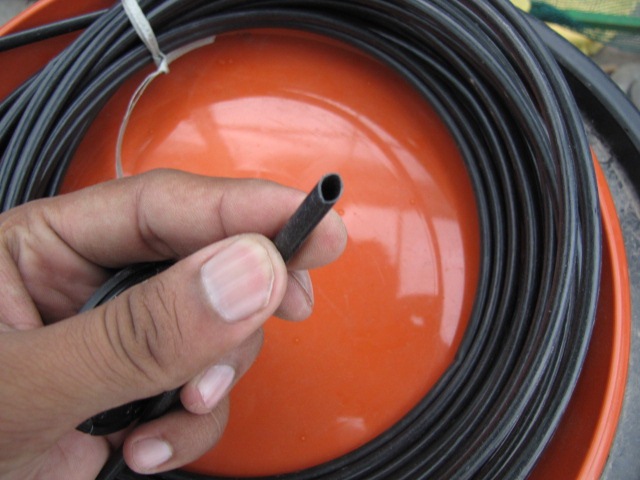
This is called Spaghetti tube. This tube is used to take the nutrient from the main drip tube to all the plants. You have to connect this tube to the one that brings the nutrients from the reservoir. To connect this you need a small connector which is pictured below this pic.

This connector is a small piece one side of which goes into the main 12mm drip tube and the other end goes into the spaghetti . Costs very cheap.

This small piece is nothing but a poker to make even sized holes for the connector to go into the main drip pipe. Handle with care. Its very sharp.

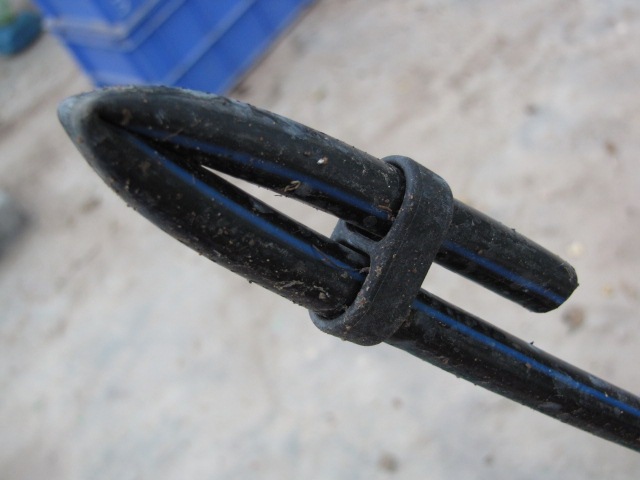
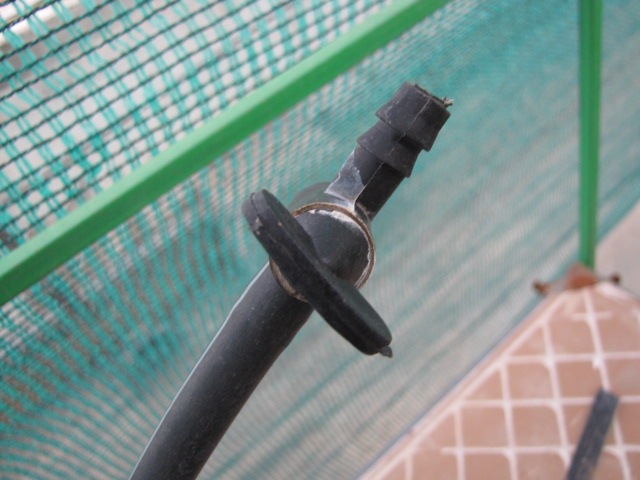
The pump pushes water from one side of the tube, the other side has to be closed to that the dripping happens on all the spaghettis connected to it. Use an endcap like below. You can either use an end cap or use a tap joint and simply close it .


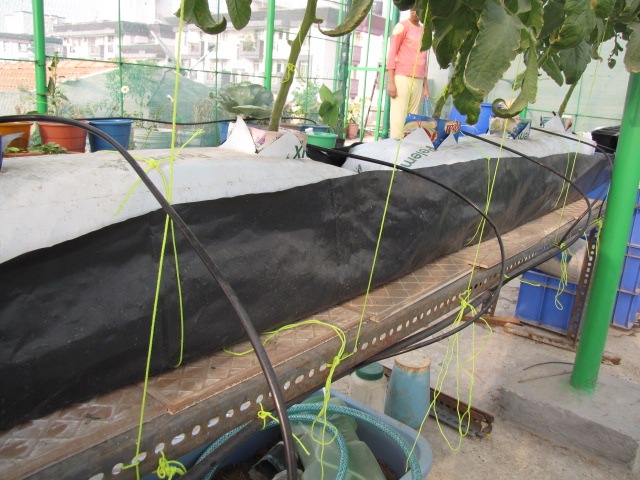
This is how it looks when the whole thing is in place, alive and pumping!

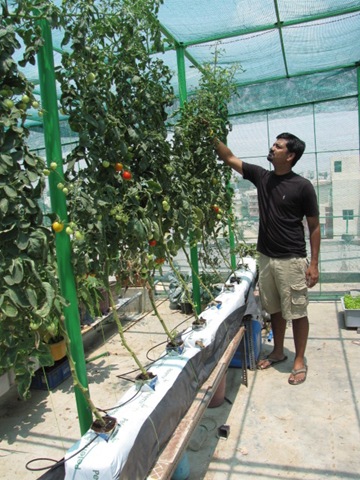
The tomatoes are growing like crazy and they have already hit the roof. I am pictured below to just show how short I am .

My goal (more like a wish) right from the beginning is always to reduce the gap between commercial and home gardening in terms of yield. In some cases I was able to come little closer but in some I failed.
In this post, I will write about growing tomatoes in grow bags. Grow bags are lay flat bags filled with potting mix. Unlike containers, they don’t provide depth but they give enough room for the roots to explore. In this experiment I used grow bags made of coco peat. They don’t contain any nutrient in it and hence its our duty to provide all the nutrients the plants need.
It all starts from the seed. This time, I had some seeds of tomato from IndoAmerican seeds. A variety called INDAM Naveen. I have already grown this variety and was impressed with the productivity.
The seeds were sown thickly in a small pot and once they showed a true leaf, they were moved into a Pro tray.
Two weeks later they looked like this.
6/2/2010
Now this is a typical grow bag. Its ~3 feet long and contains compressed cocopeat slab in it. Its ideal for growing 3-4 plants per bag.
In my case, I wanted to grow 3 tomato plants in this and hence made markings like below. Cut the bag on the lines made so that when you open the flips, you get a square hole cut out.

Next is to run water through it. Easiest is to use a pipe/hose tube. Let it soak and as it soaks, it expands as well. You can see the grow bag growing. Give it some time. Once its done, you will have fully expanded grow bag thats ready to take plants in.
Once expanded, these grow bags will look like this below. To transplant, I took juice boxes cut them into three and used them to hold the plant when they are small. Kinda made it look like Rockwool cubes
.Now comes the drainage part. Carefully make a slit 0.5-1 inch above the bottom surface of the grow bag at 2 or 3 places on the sides. As it is covered on most of the sides water loss through medium is very less. The seedlings that were in the pro tray were transplanted 3 per bag.
17/2/2010
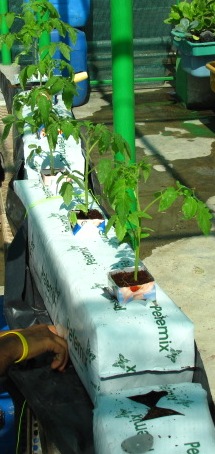
You can also see that I have lined the bench with black polythene sheet. This is to collect all the drainage water at one place. There is a slope provided to the bench, so all the drainage flow to the lowest point, where the reservoir is kept
Alright, Now comes the interesting part. How do we water this thing?. Though it can be hand watered ( which I did for first couple of weeks), it can become very difficult as the opening is very small and needs lot of patience to water it. So obviously the next step was to install a drip system and automate it. Thats lot stuff mentioned in a single line right?. we will munch bite at a a time.
So here it is after 10 days time. The stake wires tied out nice and you can also see the spaghetti drip wires. These wires deliver the nutrient water to the plants.
28/2/2010

Dripping in action.
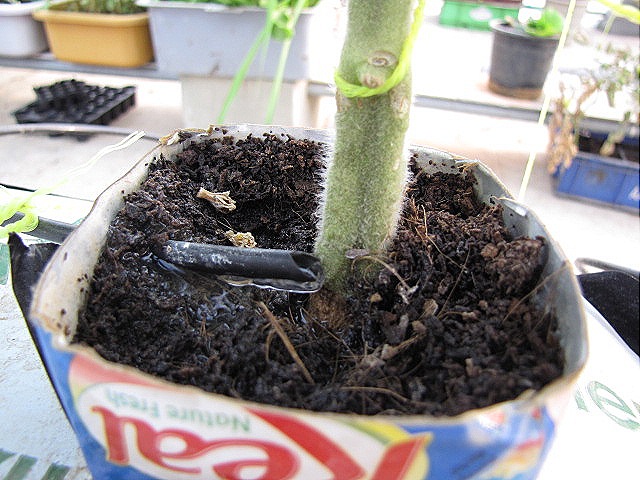
Another shot of the tomatoes on 11/3/2010
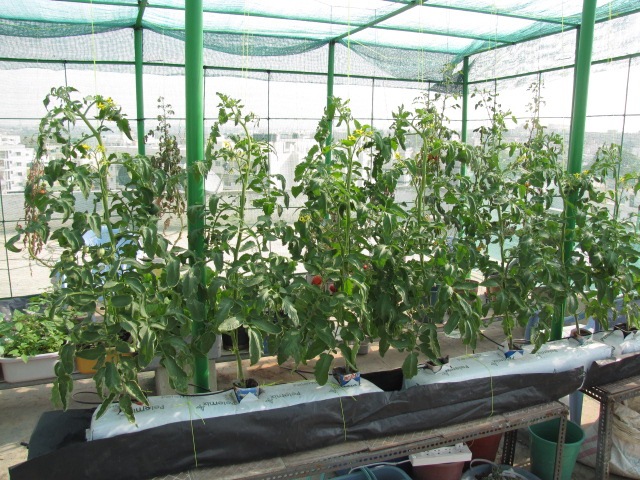
Tomatoes already started to form.
Setting up Automated Drip System:
Now comes the interesting part. Setting up the automated drip system. In Grow bag systems the nutrient is generally not recycled. But I didnt have the bandwidth to waste the nutrients. So I thought I would re use the drainage as well.
Things necessary for a automated drip system are :
- A submersible pump.
- Programmable timer
- Reservoir
- Drip tubes(Usually 12mm)
- Spaghetti tubes
- Tee joints & End caps.
Submersible Pump:
This pumps are available in SJP Road in Bangalore( Road parallel to SP Road).This is from a company called Tullu. Costs about INR400-500 and there are cheaper chinese counterpart for INR 200 or so. It pumps water at about 400-500 litres per hour to height of 4 feet. It varies with pump to pump. Needs 240 V AC to operate.
Programmable Timer:
It took really long time to get this piece of hardware in Bangalore. Myself and my friend Anil Hande were searching and searching. It comes as a bare bone timer and we need to do some more work before it gets usable.
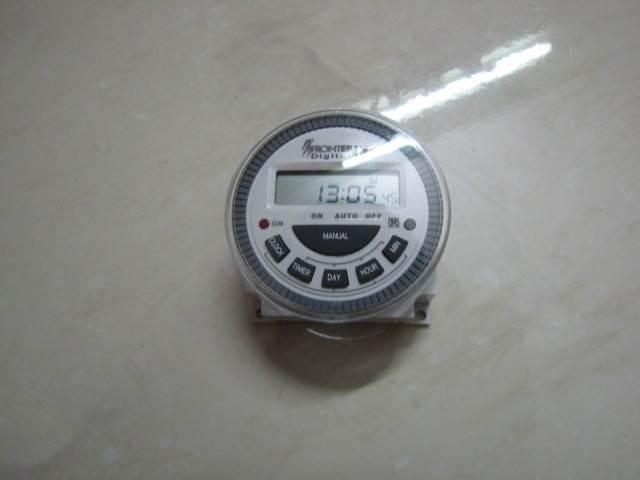
Like I said, the timer has just leads for connections and is not very user friendly. Below is the my version of the completed timer box. I got some help from Anil to get the wiring in place. You
can check out his version and more information on its wiring Anil’s Album
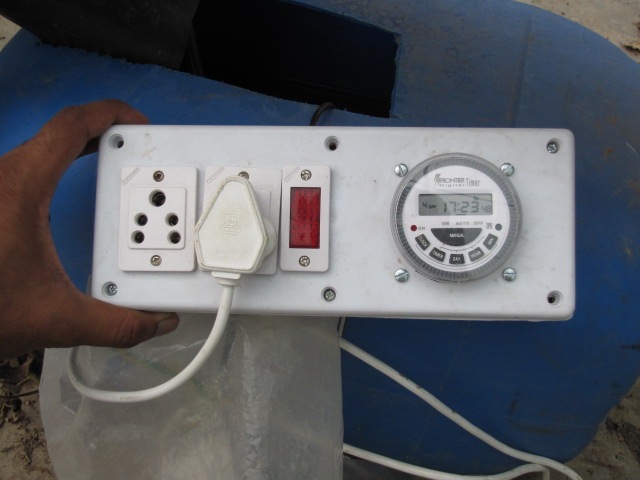
I have programmed in such a way that it operates for 15 minutes every 3 hours.
Reservoir: Here is my reservoir. Ok ..Not very nice looking but then who cares as long it is cheap. Another peace I picked up from local plastic recycle shop. The drained water pours in via the black poly sheet. Next to it you can spot the drip tube connected to Pump going out of the reservoir.
Here are some small accessories that you will need to setup a drip system.
They are called joints. On the top left, is simply joint, next is Tee joint and the one below is Tap joint. You can use them where ever you feel they are needed. There is also Elbow joint in case your drip tube needs to bend, I havent shown them in the pic. They cost INR 1 each. Available in SJP Road.
This is called Spaghetti tube. This tube is used to take the nutrient from the main drip tube to all the plants. You have to connect this tube to the one that brings the nutrients from the reservoir. To connect this you need a small connector which is pictured below this pic.
This connector is a small piece one side of which goes into the main 12mm drip tube and the other end goes into the spaghetti . Costs very cheap.
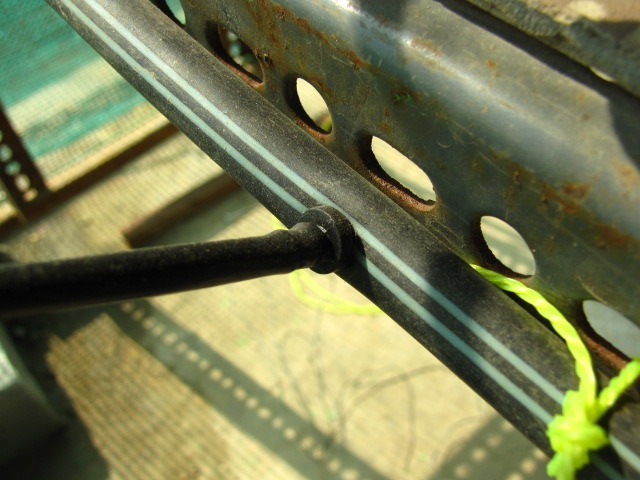
This small piece is nothing but a poker to make even sized holes for the connector to go into the main drip pipe. Handle with care. Its very sharp.

The pump pushes water from one side of the tube, the other side has to be closed to that the dripping happens on all the spaghettis connected to it. Use an endcap like below. You can either use an end cap or use a tap joint and simply close it
.
OR
This is how it looks when the whole thing is in place, alive and pumping!
The tomatoes are growing like crazy and they have already hit the roof. I am pictured below to just show how short I am
.
Grow bags are an ideal way to grow vegetables ..
http://www.technoexports.com/?page_id=347
See application form on Page No 48 : http://www.keralaagriculture.gov.in/pdf/wi_39.pdf
http://www.technoexports.com/?page_id=347
See application form on Page No 48 : http://www.keralaagriculture.gov.in/pdf/wi_39.pdf


 Posts
Posts



